When you create a ride in RideIQ, you schedule a single, one-way ride. Individual rides are best used for appointments or similar routes that do not occur regularly. For repeating rides that happen on a set schedule, use a Ride Series.
A ride in RideIQ is either a Pickup Ride, scheduled around a specific pickup time, or a Drop-off Ride, scheduled around a specific drop-off time.
You can add up to four Riders to a ride, and add additional pickup or drop-offs as needed, as long as all Riders on a drop-off ride will be dropped off in the same place, and all Riders in pickup ride will be picked up in the same place.
| Note: You can schedule a ride no later than six hours before the first pickup time. We encourage you to schedule rides as far in advance as possible. |
How to create an individual ride
Follow these steps to create a ride:
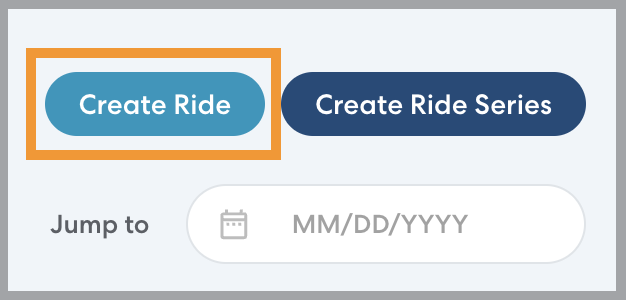
- On the Riders page, click the Rider you’d like to schedule a ride for.
- Click Create Ride.
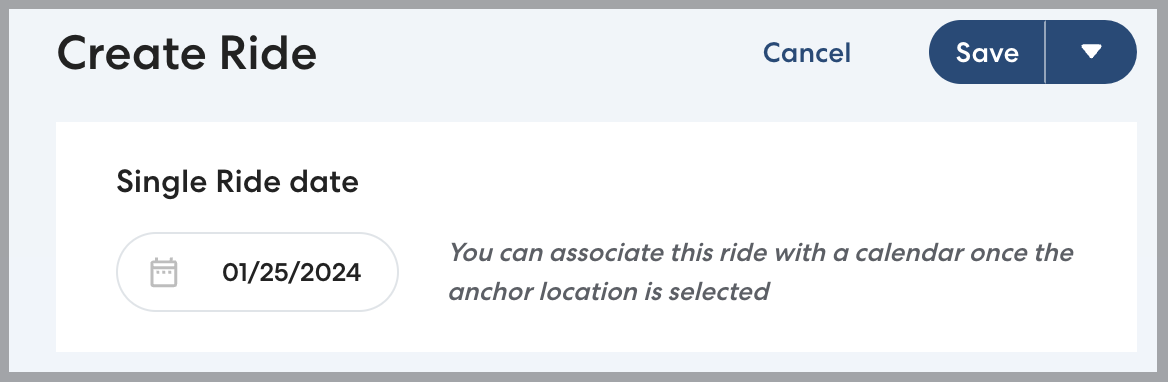
- Select a date for the ride. If desired, add a calendar. In most cases, however, there is no need to add a calendar to a single ride.
-
Select the Route type. You can choose:
-
Pickup route: All Riders are picked up from one location at a set time and may be dropped off at different locations. For example, two Riders are picked up from the same school at 3:15 PM and dropped off at their homes.
-
Drop-off route: All Riders are dropped off at the same location at a set time, and may be picked up from different locations. For example, three Riders are picked up from their homes and dropped off at school at 7:30 AM.

-
Pickup route: All Riders are picked up from one location at a set time and may be dropped off at different locations. For example, two Riders are picked up from the same school at 3:15 PM and dropped off at their homes.
- Set the anchor time and Location for the ride. The anchor is the pickup location for a pickup ride or the drop-off location for a drop-off ride.
-
Time: when setting a time, include enough buffer time for the Rider to travel to and from the car. For example, if school ends at 2:55 PM, you might schedule a pickup time of 3:00 PM.
-
Location: If the Rider has a Primary Residence or Primary Destination assigned, these Locations will be automatically populated for the ride. If you’d like to change the Location, click the gray X.
Otherwise, click the Select Pickup Location or Select Drop-off Location field to choose from saved Locations or type an address to create a new Location. Learn more about creating and using Locations in this article.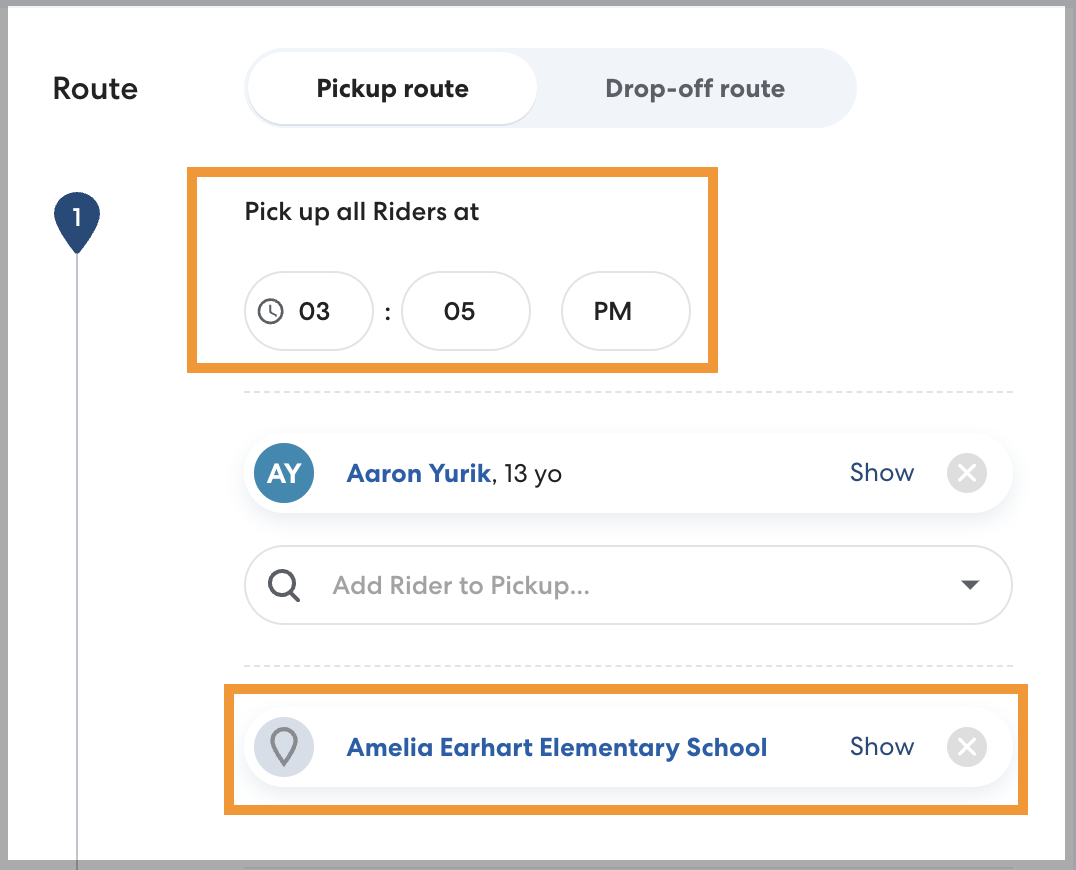
-
Time: when setting a time, include enough buffer time for the Rider to travel to and from the car. For example, if school ends at 2:55 PM, you might schedule a pickup time of 3:00 PM.
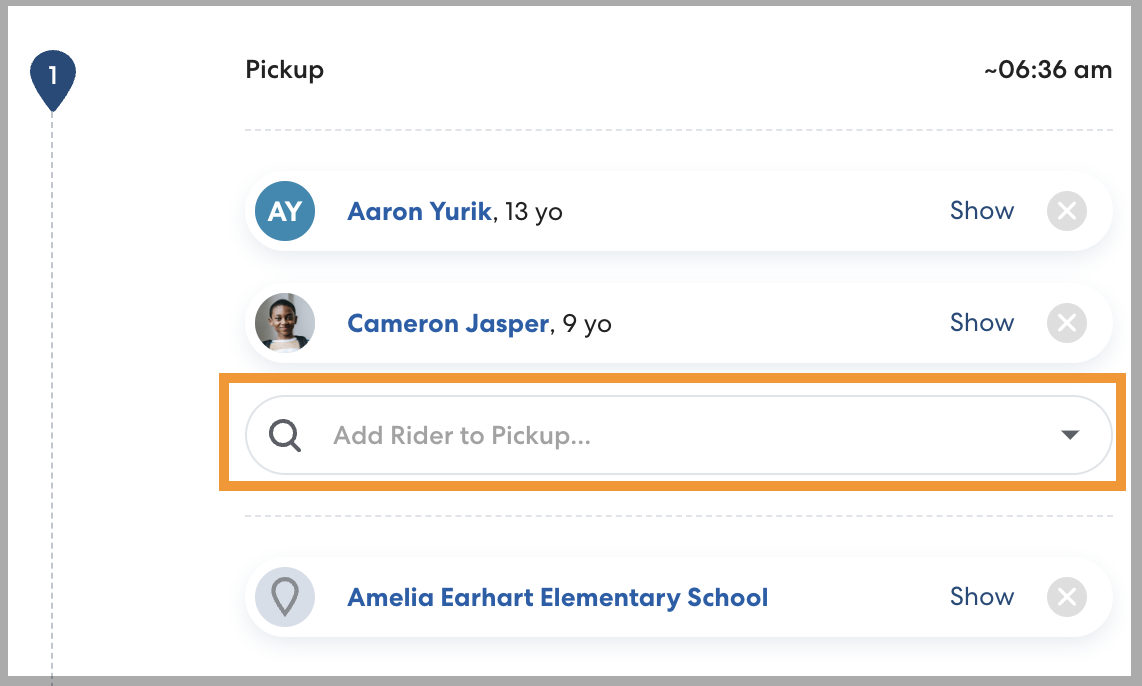
- If desired, add any additional Riders by typing their name in the Add Rider to Pickup field.
- Select the non-anchor Location for the ride. The time will be calculated automatically based on the anchor time. If you are creating a ride with multiple Riders who need to be picked up or dropped off at different locations, learn how in this article.

- Optionally, add a tag. Begin typing the desired tag, then select from the list or press enter to create a new tag. Use tags to sort and group related rides, such as rides for a set of students in the same program, early release schedules, etc. Learn more about tags here.

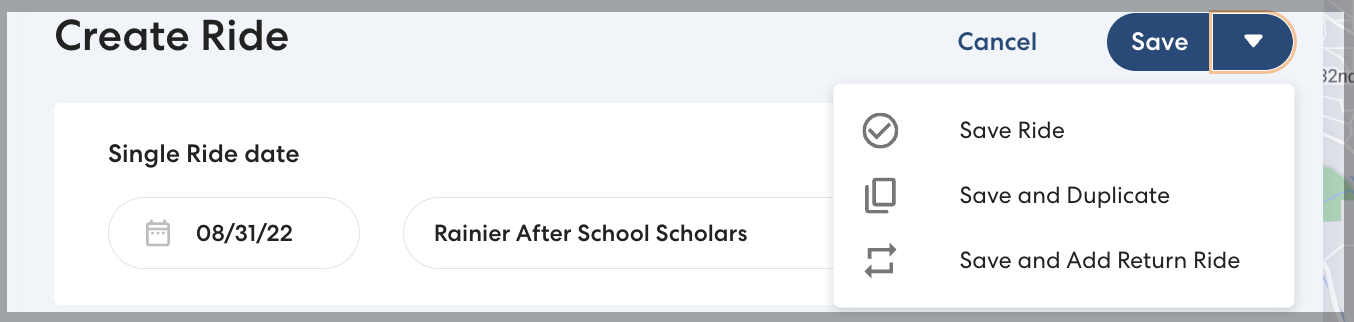
- Save the ride. You can choose:
- Save Ride: Save a single, one-way ride.
- Save and Duplicate: Save the ride and create a copy. You can use the duplicate ride to save time when creating multiple rides that are similar.
- Save and Add Return Ride: Save the ride and create a return ride with the pickup and drop-off locations reversed. This is recommended if the Rider requires round-trip transportation.