Understanding locations in RideIQ
When you create a location in RideIQ, you create a saved address with a descriptive name, pickup and drop-off notes, and an associated calendar (if desired). Once the location is created, any user from your organization can use it when creating a ride by typing the name without needing to re-enter any other details.
There are three ways to create a new location in RideIQ:
-
From the Locations page: this is the best option when adding school addresses or similar locations that will be used for many riders. You can assign a calendar and set a precise location pin.
-
From a rider profile: this is the best option when adding a rider's residence address. You can assign the location as the rider's Primary Residence and use Find and Replace for efficient address changes.
- While creating a ride: this option is most efficient if you're already in the process of creating a ride or for locations that will only be used once.
However you create a location, it will be available to be added to rides for any rider. Pickup and drop-off notes and calendar assignments will apply any time the location is used.
Once you have created a location, you can edit it from a rider profile or the Locations page. Learn more about editing Locations in this article.
Creating a new location
Follow the steps below to create a new Location from the Locations page. Similar steps apply when creating a location via rider profile or on the fly during ride scheduling.
- On the Locations page, click Create Location.
- Enter the location address, then check the pin location shown on the map. To direct CareDrivers to the correct place, click Add pin to drop a precise pin in the exact area for pickup and drop-off.
Adding a pin is optional, but strongly recommended for large campuses or addresses with multiple driveways or parking lots. You can read more about how to use precise location pins in this article.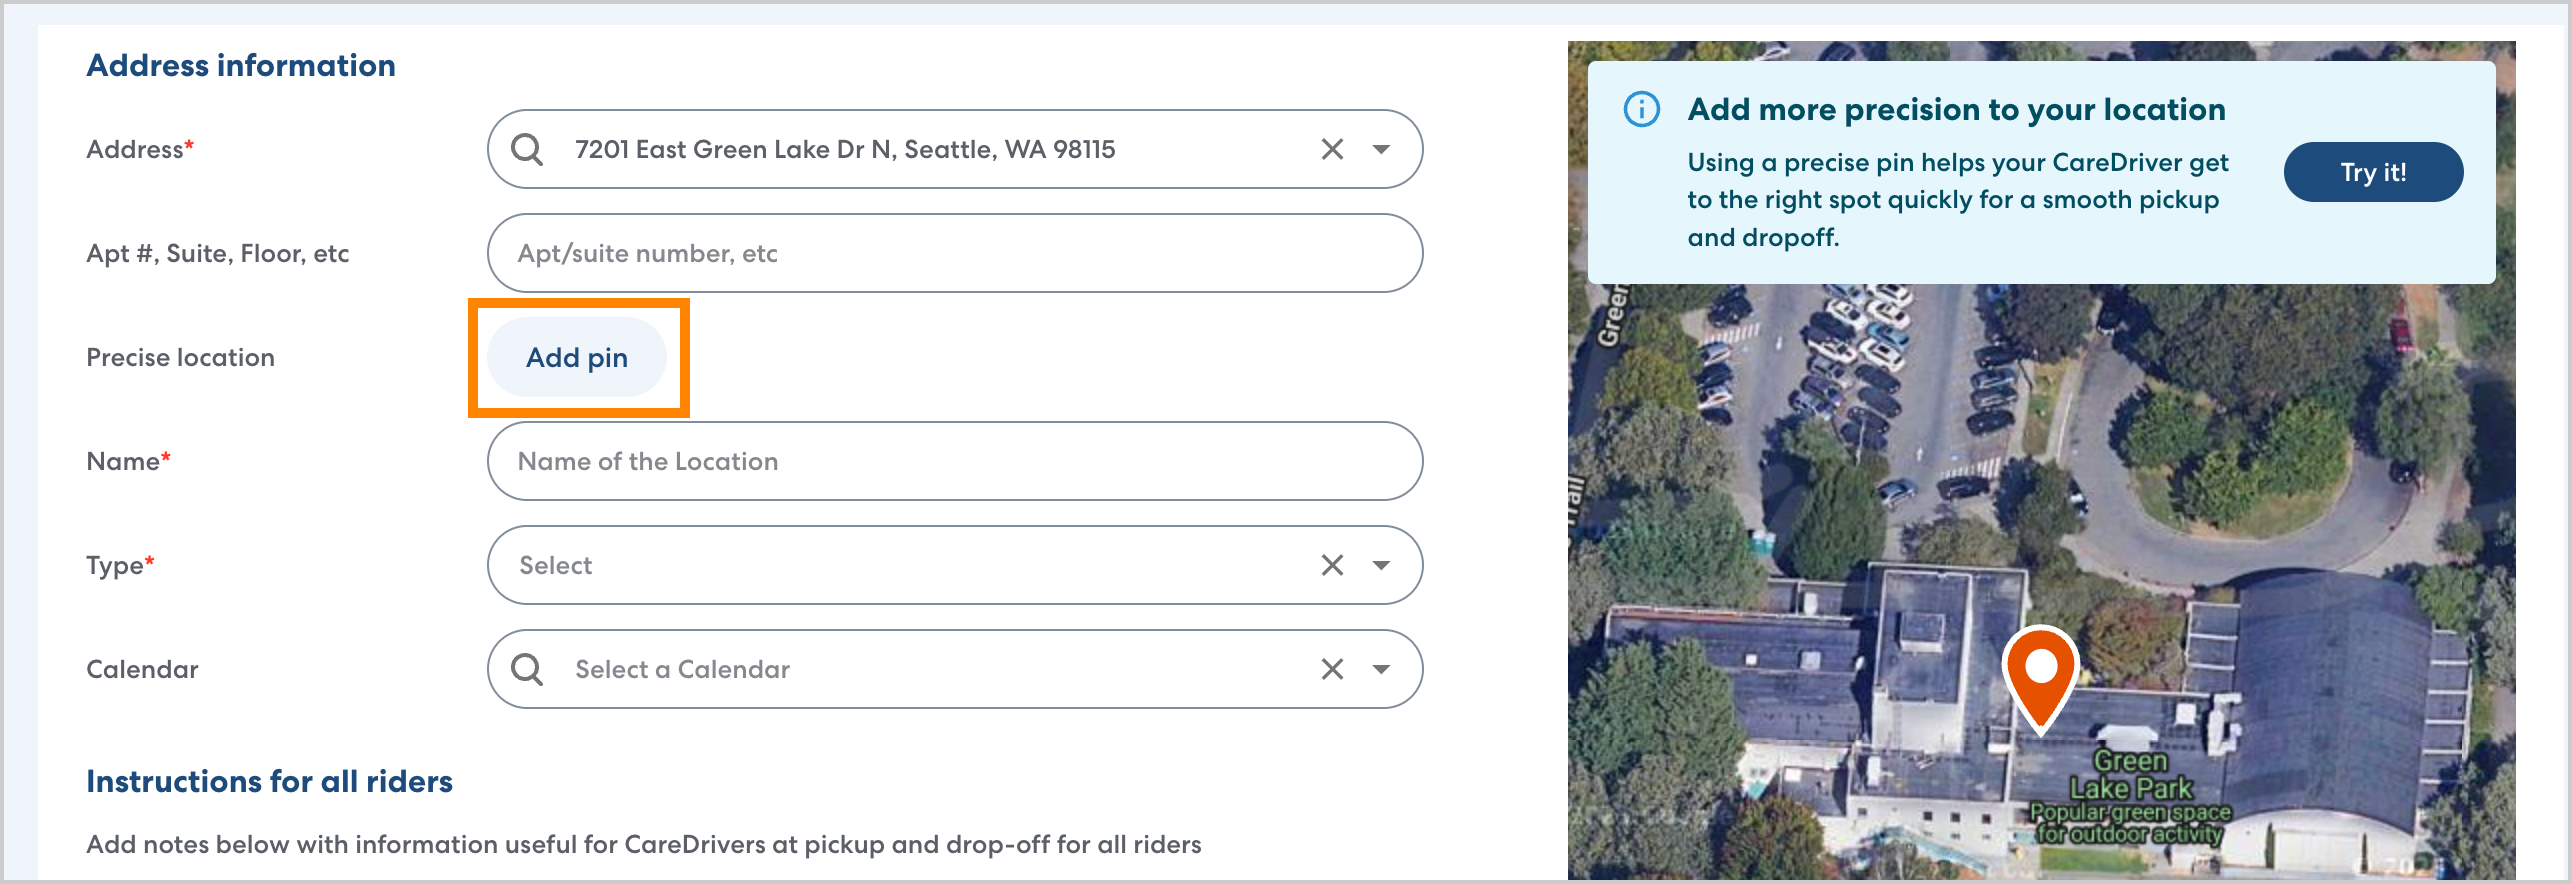
- Give the location a clear name. Follow the best practices below:
- For rider residences, include the rider's name. For example: J Rodriguez Home, not Home address.
- Some school location names will auto-populate. If this does not happen, enter the full name of the school to ensure it is easy for other users to find. For example: Harriet Tubman Elementary not Tubman.
- Do not enter the location address as the name.
- For rider residences, include the rider's name. For example: J Rodriguez Home, not Home address.
- Select the location type. Assigning the correct location type is important for additional features such as Primary Destination. You can choose School, Residence, or Other.
- Optionally, assign a calendar to the location. In general, School locations should be assigned calendars, but they are not necessary for Residence locations.
When a location has an assigned calendar, any Ride Series with that location as an Anchor location will automatically adjust for holidays and time off.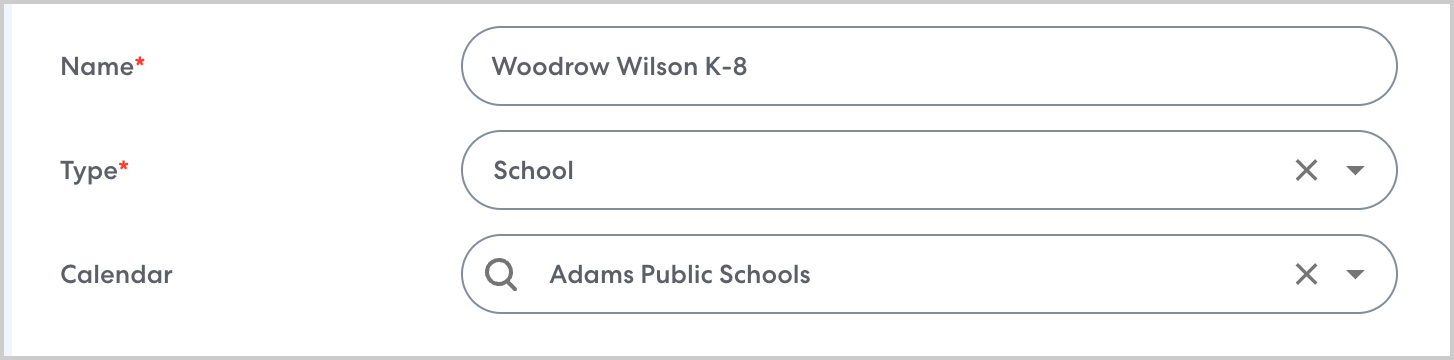
- In Instructions, add any information that will be useful for CareDrivers at pickup and drop-off. This could include:
- Procedures for checking riders in or out, if any. For example: Sign out rider with staff member holding clipboard.
- Details about general pickup and drop-off procedures. For example: If rider is not ready at pickup, please pull through and go through pickup line again. Do not wait at doors.
- Landmarks or other information about where to drop off or pick up riders. For best results, combine this information with a precise location pin. For example: Students wait near large statue south of main doors.

- Procedures for checking riders in or out, if any. For example: Sign out rider with staff member holding clipboard.