In this article
RideIQ Reports allow you to answer questions about how your organization uses RideIQ, grouping your reports by useful categories to find the data that is most relevant to you.
Setting up a report
Use filters to see the data you need. Choose the date period you'd like to see data for, then filter by ride status and rider attributes.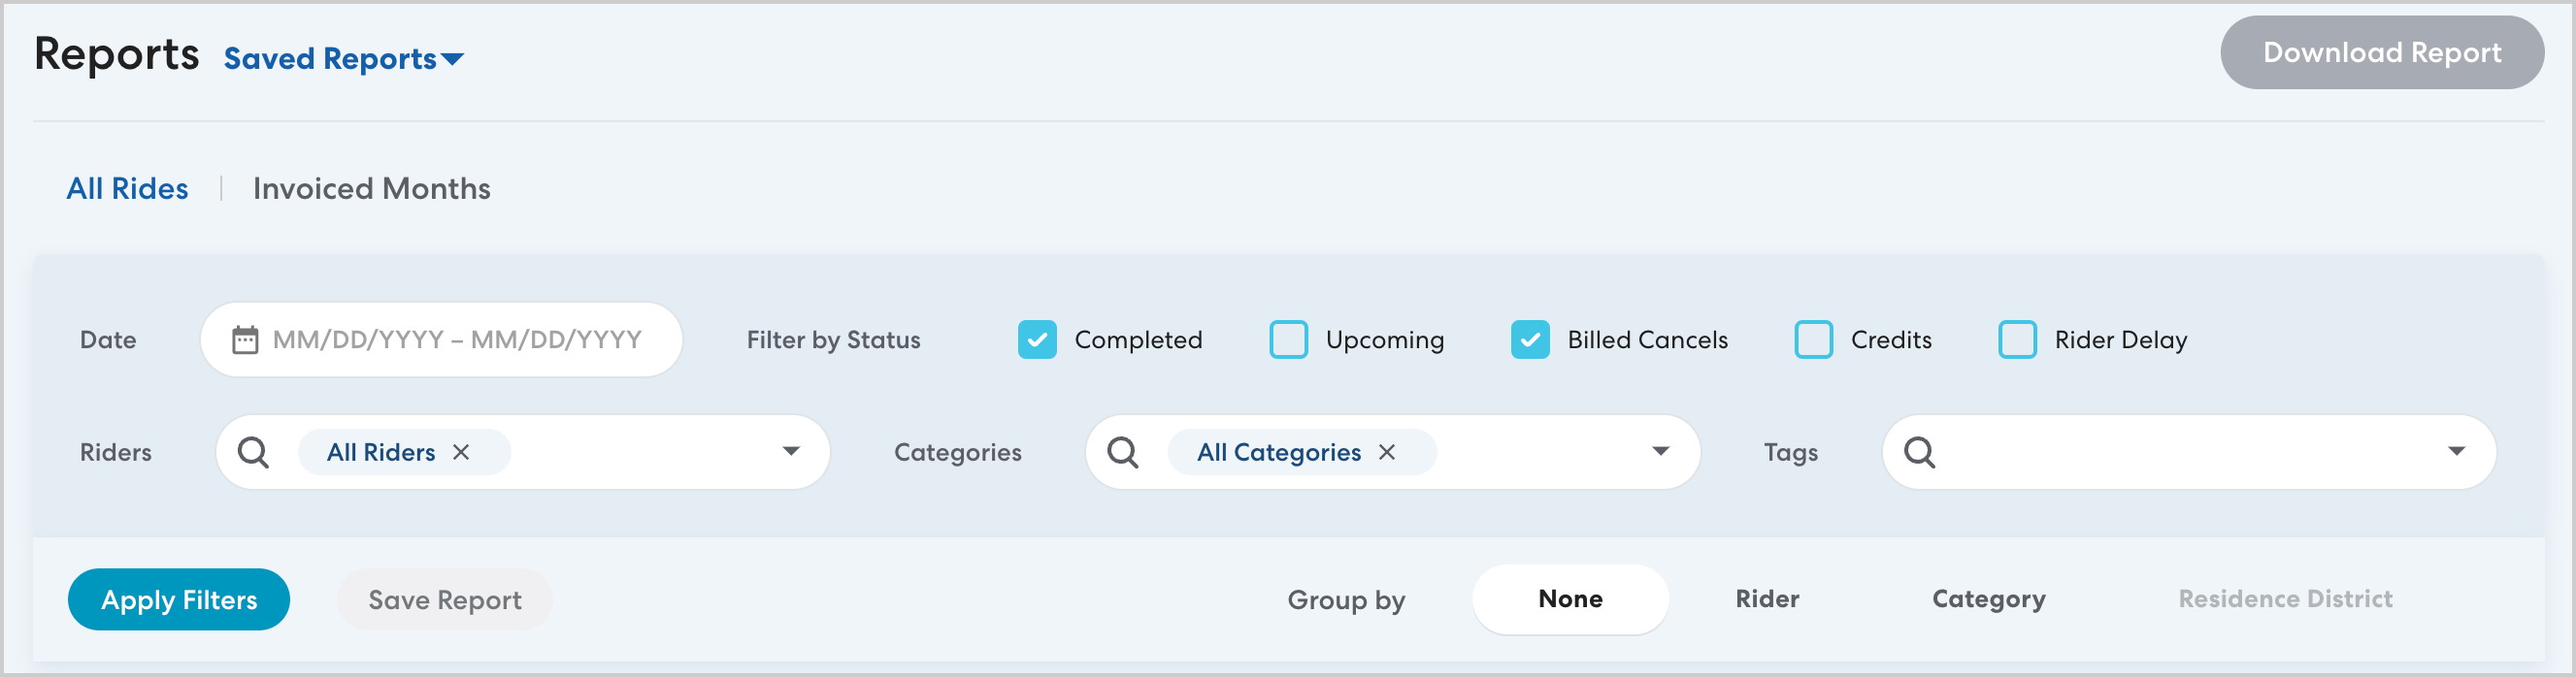
Use Report filters in combination to see only the information you need organized in a way that surfaces the data you're interested in.
For example:
- Run a report on Billed Cancels organized by Rider to identify riders who are consistently missing rides or canceling at the last minute.
- Run a report on Completed rides organized by Category to help guide budgeting for the coming year.
- Run a report on all rides for a specific rider to quickly get an overview of their schedule and ride history.
Available filters
Refine reports using the following filters:
Status: Select which types of ride to include in the report. Status filters are additive: if you select Upcoming and Billed Cancels, you will see any rides that are either Upcoming or a Billed Cancel.
- Completed: Rides that have been completed as of the time you run the report.
- Upcoming: Scheduled rides that have not yet been completed.
- Billed Cancels: Canceled rides that incurred a cancellation fee. This includes fees riders who were removed from a multi-rider ride.
- Credits: Rides that HopSkipDrive issued a credit for.
-
Rider Delay: Rides where the CareDriver waited for the rider for more than a set period (usually 10 minutes).

Riders: To report on specific Riders or groups of riders, first remove the All Riders filter. You can then choose:
- All Riders Excluding Shared Riders: do not include riders whose costs are shared with another district.
- Only Shared Riders: report only on riders whose costs are shared with another district.
-
Riders by name: begin typing the name of a rider, then select from the list to add the rider to the report.
Categories: To report on specific rider categories, remove the All Categories filter and select one or more categories from the list. 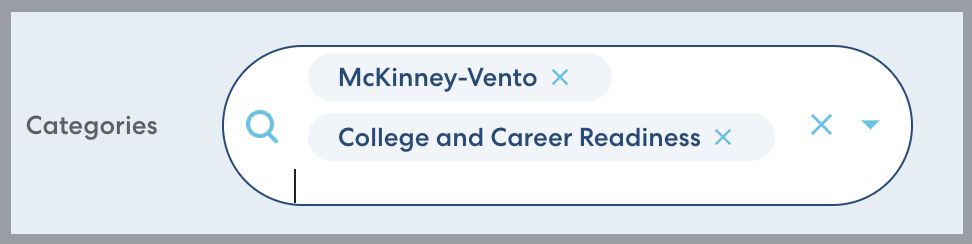
Tags: To report on rides with a specific tag, select any desired tags from the list.
Group by: After selecting the desired filters, use Group by to sort the results. You can sort rides by Rider, Category, or Residence District. Note that Residence District is only available if the report includes shared riders.

Green Rides
The Green Rides totals at the top of any report indicate the number of rides and miles that were completed in a hybrid or electric vehicle. When reviewing these numbers, note that the overall totals (shown in blue) include billed cancels, if applicable. The totals shown for Green Rides include only completed rides. Learn more about Green Rides in this article.
Saving a report
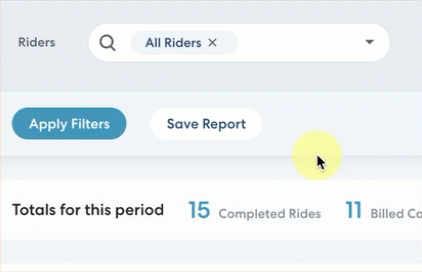
Once you have your report filters configured, you can save the report view to access any time. To save your report, click Save Report.
You can set a saved report as your default report to load when you open the Reports page. You can also mark a report as favorite to make it easy to find at the top of the Custom Report Views list.
Learn more about saving reports in this article.
Common reports
See how to create some common report types below:
Downloading reports
Once you have set your filters, click Download Report to download your report as a .csv file. 
Check the email you use to log in to RideIQ for a link to download the report. Depending on the amount of data in the report, it may take a few minutes to process.