Setting up a rider profile for each passenger you’ll be scheduling rides for is a key first step to efficiently using RideIQ.
To create a new rider, on the Riders page, click Create Rider.

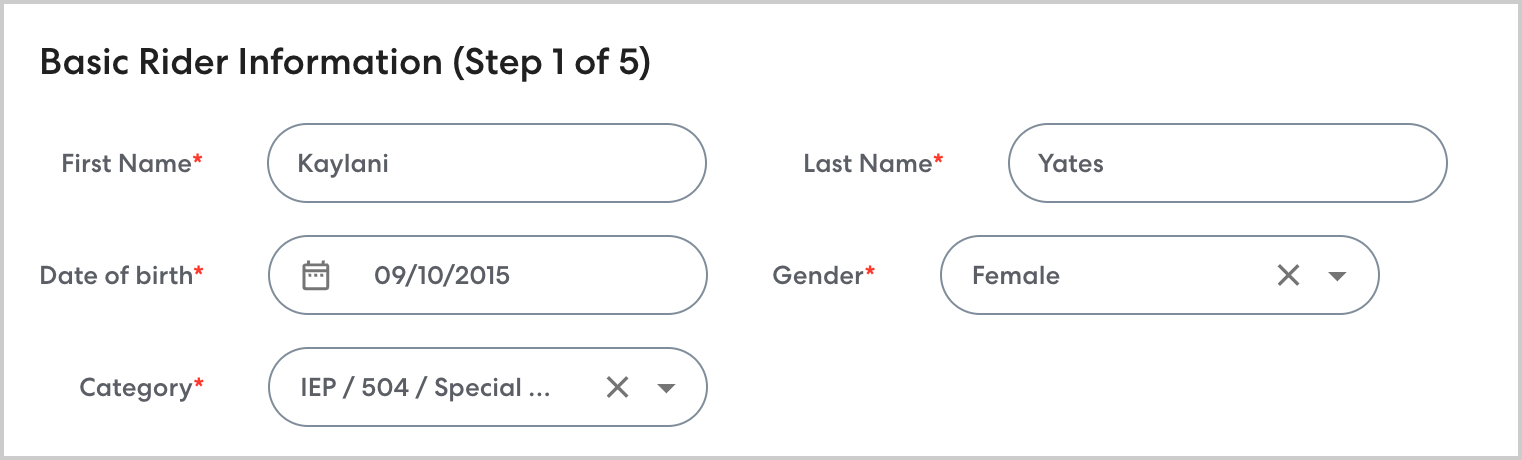
Step 1: Basic Rider Information
Enter the following basic rider information:
-
First and Last Name: enter the rider’s first and last name.
-
Date of birth: the birthday will be used to confirm the rider’s identity, so it is important to enter the correct date.
-
Gender: select the rider’s gender from the dropdown list.
- Category: select the category that best describes the rider. Rider categories are used for reporting and for your own organization. They are not displayed to CareDrivers. Learn more about rider categories here.
-
Aide Status: some districts provide adult aides who ride along with certain riders. Use this check box to indicate that you are setting up a profile for one of these Rider Aides. When you designate a profile as an aide, special cancellation functionality applies. Learn more about Rider Aides in this article. Note that Rider Aides are distinct from Rider Assistants. You can learn more about Rider Assistants in this article.
For most riders you will not select this check box.
-
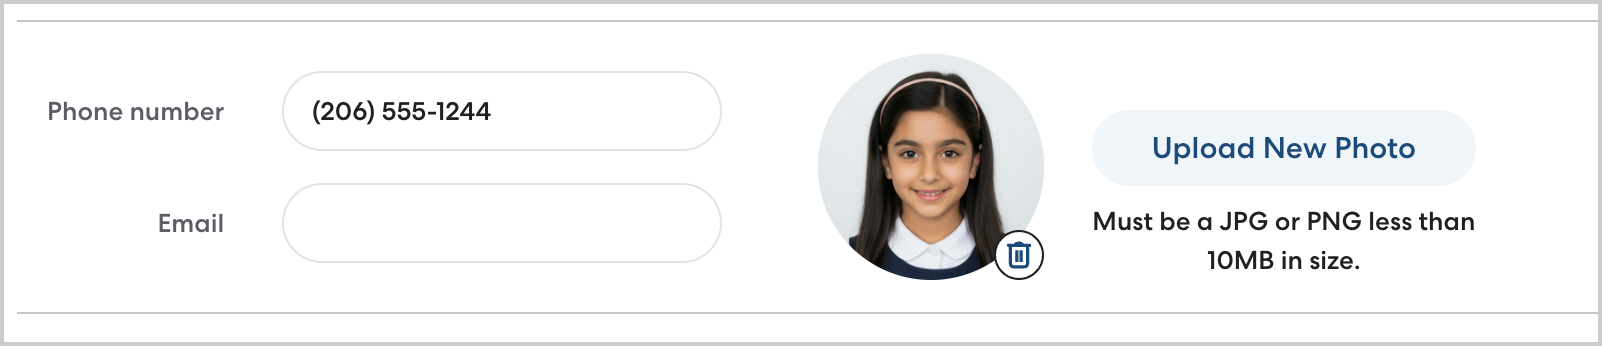
Phone number: when you enter a phone number, the rider will receive text messages with information about their CareDriver when they are on the way, schedule updates, and a link to the Track My Ride page. The CareDriver will also be able to contact the rider if they’re having trouble finding them at pickup.
- The phone number is always hidden and the CareDriver can only contact the rider through the app while a ride is in progress. Learn more about rider phone numbers here.
-
Do not enter the number for a caregiver or other contact here. You can add additional contacts at a later step.
- The phone number is always hidden and the CareDriver can only contact the rider through the app while a ride is in progress. Learn more about rider phone numbers here.
-
Email: optionally, add an email as an additional contact method. Currently, riders do not receive any emails from HopSkipDrive.
-
Photo: upload a clear, current photo of the rider to help CareDrivers find them at pickup. This is an important way you can help pickup go smoothly.
-
ID Number: optionally, add the rider’s ID Number. This can be useful in accurately tracking riders with similar or identical names.
-
Invoice group: assign the rider to a designated group for accounting purposes. You will receive a separate invoice for each invoice group. Note that this field is only visible to Account Admin users.
-
This rider's transportation costs are shared with another district: if your district shares transportation costs for a rider with another district, select this check box to set up shared billing to automatically split the costs. Learn more about how shared billing works in this article.

Click Next.
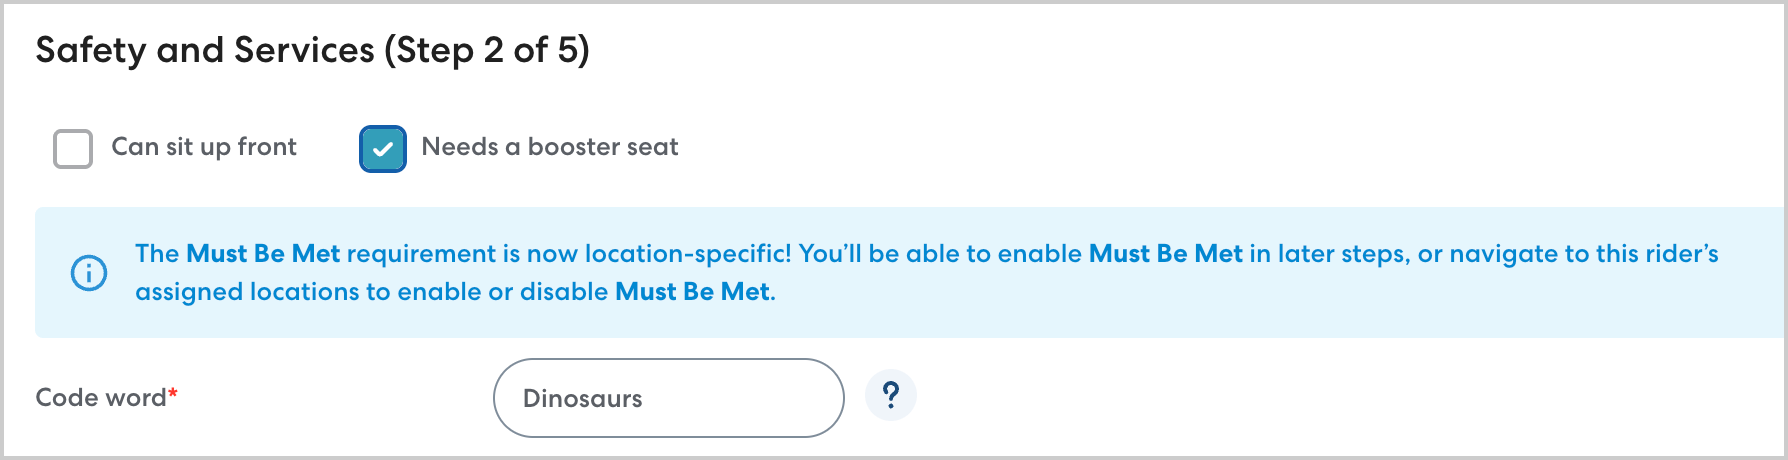
Step 2: Safety and Services
Configure the following safety settings for the rider:
-
Can sit up front: this option can be enabled for riders who are 12 or older and who meet the requirements to safely ride in the front seat. You cannot select this option for riders younger than 12 years old.
-
Needs booster seat: riders eight and under must have a booster seat (nine and under in Colorado). CareDrivers will provide the required booster seats. You may select this option for older riders if required.
-
Code word: enter a unique code word. The CareDriver will say this word to the rider at pickup to confirm their identity. This word should be unique to the rider.
-
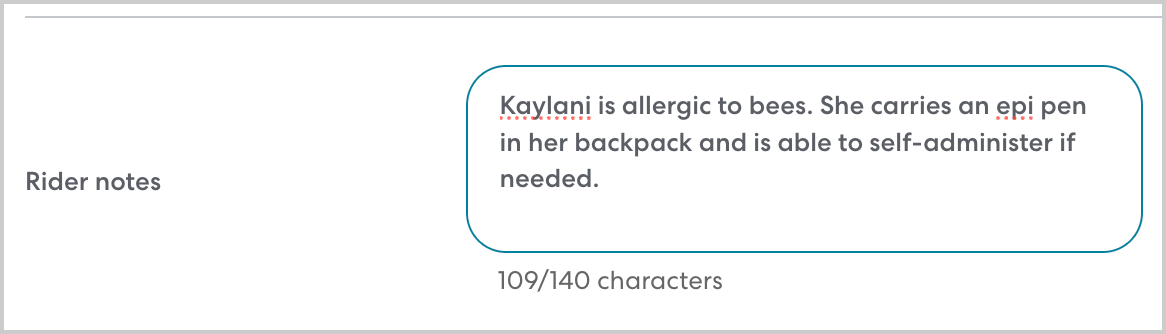
Rider notes: these notes are displayed to the CareDriver. Enter information that will help the CareDriver safely and successfully transport the rider. This could include allergies, required accommodations, or other details.
- If applicable, select one or more Rider Services. Rider Services are additional transportation services that can be added for an additional per-ride fee. Each service must be enabled at the account level before it can be added to a rider's profile. Learn more about Rider Services here.
Click Next.
Step 3: Add Caregiver
Enter information about the rider’s caregiver. This person will be the main point of contact for the rider and is generally their parent or guardian. After you save the rider profile, you can add additional caregivers or Emergency Contacts. Enter the following information:
-
First and last name
-
Role: At least one caregiver is required, so this field cannot be edited. However, you can add additional emergency contacts by editing the rider’s profile.
-
Relationship: select the option that best describes the caregiver’s relationship to the rider.
-
Phone: enter a cell phone number for the caregiver. The caregiver will receive text updates about rides in progress, be able to contact and be contacted by the CareDriver during the ride, and can download the HopSkipDrive app to track rides in real time or cancel them when they are not needed. Learn more here.
-
Email: optionally, add an email for an additional point of contact.
Click Next.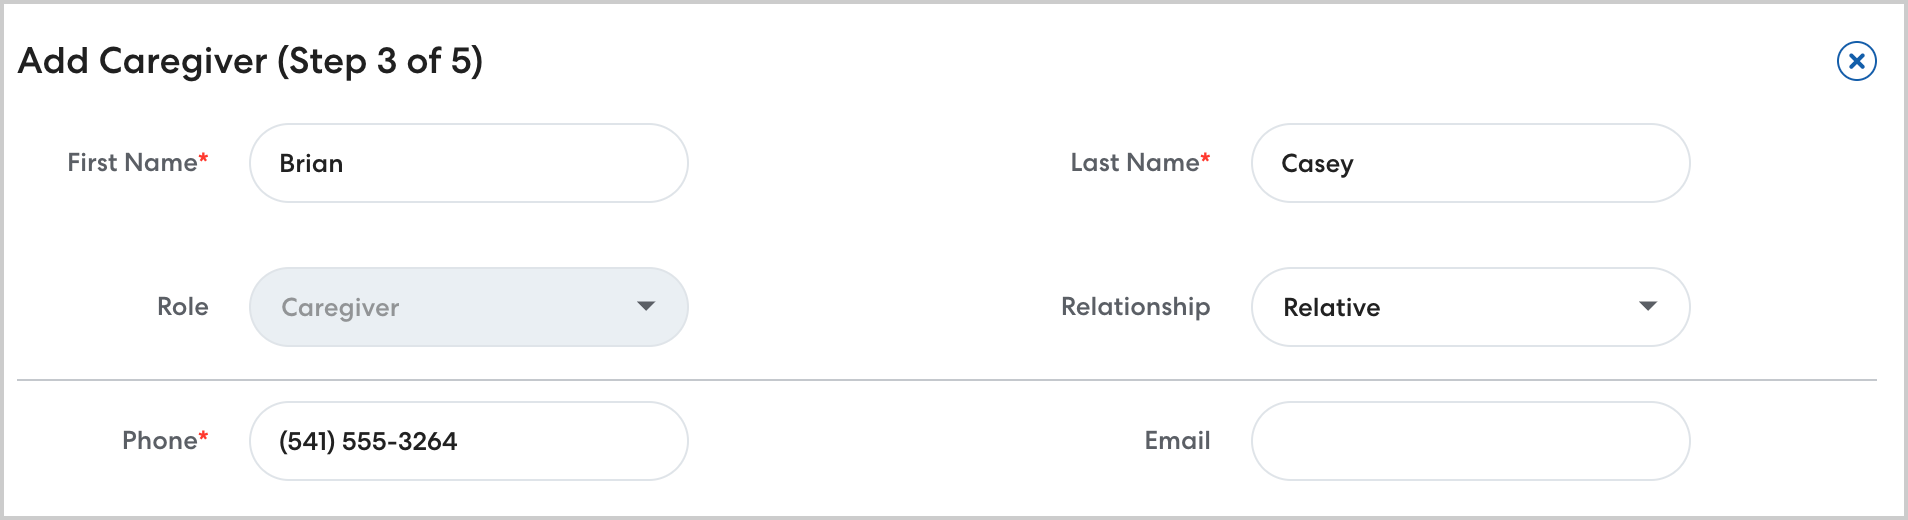
Step 4: Add Primary Residence Address
Optionally, enter the address of the location the rider will be living while receiving rides. This Primary Residence will automatically be populated as the pickup location when you schedule rides for this rider. If needed, the pickup location for a ride and a rider’s primary residence can be edited at any time. Learn more about Primary Residences here.
Enter the following information:
-
Address: begin typing an address. If the location is already saved in RideIQ, you can select it from the list. Otherwise, select the correct auto-completed address to create a new location.
-
Name: type a descriptive name for the location. We recommend including the rider’s name to make it easy to identify.
-
Pickup and Drop-off Instructions: CareDrivers rely on instructions to find the correct address and safely transport the rider. Add any helpful details here, including any special instructions for how to find or drop off the rider safely. Learn more about Location instructions here.
-
Rider must be met at drop-off: select this option to require the CareDriver to hand off the rider to a specified Authorized Individual group, following one of three drop-off protocols. Learn more here.
Click Next.
Step 5: Add School Address
Optionally, enter the rider's school information. (If the rider is an older adult, this option will not be available.) When you enter the school information at this stage, it is designated as the rider's Primary Destination and will automatically be added as the drop-off destination when you schedule a ride.
Enter the following information:
-
School: enter the school address, or select from the list of saved account locations.
-
Name: type a descriptive name for the location.
-
Pickup and Drop-off Instructions: CareDrivers rely on instructions to find the correct address and safely transport the rider. Add any helpful details here, including any special instructions for how to find or drop off the rider safely. Learn more about Location instructions here.
-
Rider must be met at drop-off: select this option to require the CareDriver to hand off the rider to a specified Authorized Individual group, following one of three drop-off protocols. Learn more here.
Click Finish. The rider is now created and you can begin scheduling rides.